Tuesday, December 24, 2013

Vegetarian Pot Pie


This is a perfect dish for the vegetarians (and everyone else) in your life! 
A perfect addition to any holiday meal. 

I have been a lacto-ovo vegetarian (I eat eggs and dairy, but no meat or meat products, including meat broths and meat oils) since 1990. My children have been raised on a vegetarian diet, but have been free to choose for themselves. At this point, my 18 and 19 year olds eat anything but my 14 year old is still a vegetarian.

As a vegetarian, I struggled with a "main dish" for holiday meals. We generally celebrate with others, so there is usually the traditional holiday fare: turkey or ham, stuffing, mashed potatoes, gravy, some sort of yam/sweet potato dish, a vegetable dish, a salad, rolls, ... I make sure that we have stuffing and gravy made without traditional broth. So we used to just eat the side dishes. But at one pot-luck Thanksgiving, someone brought a pot-pie that was absolutely delicious! So I worked on making my own... 

Ingredients in THIS pot pie: 
1 tablespoon olive oil
2 russett potatoes, diced
1 sweet potato, diced
1 yellow onion, chopped
1 teaspoon salt
1/2 teaspoon black pepper
1 yellow bell pepper, chopped
1 red bell pepper, chopped
4 carrots, chopped
4 spears celery, chopped
1 pear, chopped
2 handfuls kale, sliced
1 cup water
1 vegetable bouillon cube
1 can cream of broccoli soup 
Directions:
1. Make crust. Use your favorite crust recipe (if you are making this for vegetarians, make sure your recipe does not include lard!) or mine: http://mamasnotperfect.blogspot.com/2013/12/pie-crust.html
I make this in a large dish, so when I make this crust, I divide it into two, and use one full plus half the other for the bottom. Then I make another batch and use one and a half for the top. I use the other half for a pumpkin pie or something else. (My crust never works out if I double the recipe, so I always make it in two separate batches.)
2. Heat olive oil in a large skillet (I use a large deep dish iron skillet) over medium-high heat. When oil is warmed, add potatoes, sweet potatoes, and onions. Saute over medium-high heat until potatoes start to soften.
2. Add salt, pepper, bell peppers, carrots, and celery. Continue sauteing over medium-high heat for about five minutes. Heat 1 cup of water with the bouillon cube in microwave for about one minute, enough to dissolve bouillon. Add the water/bouillon to the vegetables and continue to saute. Cook until the vegetables are soft (but not mushy!).
3. Add pear and kale. Stir to combine, cook for about 2 minutes. Add the can of cream soup. Mix.
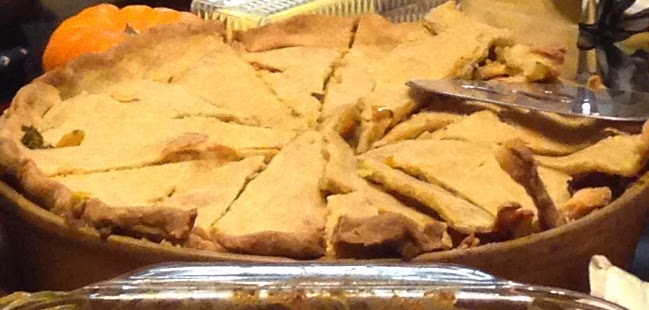
4. Oil the dish, put in the bottom crust, then pour everything from the skillet into dish. Then add crust on top. Poke a few holes in the top, then bake in a preheated oven at 350 degrees (F) for 50 minutes.

This is always DELICIOUS! Everyone raves about it, vegetarians and non-vegetarians.

Notes: I never make this the same. I always use sweet potatoes or yams, just because they are so yummy. I use whatever potatoes I have on hand: russets, new potatoes, red potatoes, whatever. I've made it with yellow or red onions. Leeks work too. I use any color bell pepper or the little sweet peppers. I nearly always put carrots and celery in it, unless I run out when making stuffing. Sometimes I use apples instead of pears. Fruit seems odd, but it adds something so yummy! And I throw in spinach or kale, depending on what I have. I have also added frozen peas (at the end, when I add the pears and kale) or corn or green beans (fresh-add with the carrots, frozen or canned, add with the pears). You can use canned vegetable broth instead of water and bouillon. If you are serving this to vegetarians, just be sure it is VEGETABLE broth and not chicken or beef broth. I don't add tofu, as I have to be careful about ingesting too much estrogen, but if you want to add tofu, saute it first and add with the pears. I haven't tried adding beans, but that would be another easy way to add protein. Add canned beans in step 3, with the pears. I'm thinking kidney beans would be best.


Monday, December 23, 2013

Pie Crust


I'm going to post a couple of recipes that use pie crust, so I thought I should begin by posting my family's pie crust (above is a completed apple pie using this crust). I have no idea where this recipe came from, just that my family has been using it for ages. I'm sure someone got it from a magazine or a box a long time ago-I highly doubt it was "created" by a member of my family. But I do know that my great-grandmother used it, my grandmother used it, my mom uses it, I use it...
 
 Ingredients:
2 cups flour
1 teaspoon salt
1/2 cup vegetable oil
1/4 cup milk


Directions:
1. Fluff flour and salt in bowl.
2. Combine oil and milk in a measuring cup.
3. Mix both in bowl (but not too much!).
4. Divide in half-roll each half between two sheets of wax paper to size of pie pan.
5. Flip into pie pan.
6. If pie with no top, press crust between thumbs of both hands to make the pattern (right). If pie with a top, leave draped over the edge (but trim edge so it is slightly hanging over pan). Fill pie, then place other half of crust over top. Then smoosh the ends of the crust together with thumbs as for crust below.
There are a lot of pie crusts recipes around. This is what I always use-it's my favorite.


Sunday, December 22, 2013

Flour Tortillas


I used to make homemade flour tortillas all the time when I was younger. My mom made EVERYTHING from scratch, so I grew up that way. As a teenager, I think I made tortillas weekly-we lived on Mexican food!! When I started living on my own, I didn't really make anything "from scratch" for ages!! I was happy to go to the store and purchase a package of tortillas, or a thing of bread. Didn't see the point in spending hours making any of that. But, life goes on... And don't our memories sometimes make things seem perfect?!?

I do remember loving homemade flour tortillas. And I've been talking about them with fond memories for quite some time. My kids were tired of hearing about them! Truthfully, I don't think they believed that I had ever made homemade tortillas.

I had been looking at recipes for a while, making sure that I had everything I would need, so that when the desire to make them actually hit, I'd have everything I'd need. I couldn't find the recipe I used when I was younger, so I used a recipe that I found on pinterest. (See?? I'm trying out some of those recipes I pinned!!) Find the recipe that I used here: http://therecipecritic.com/2012/08/homemade-tortillas/.
 
The only change I made to Alyssa's recipe (at therecipecritic.com) was that I used 2 cups of white flour and one cup of whole wheat flour, rather than the 3 cups white flour. I know-everyone talks about anything wheat as being the devil right now. Gluten is BAD. But I still eat it. So my attempt to make them a little healthier meant that I would add wheat flour rather than all bleached white flour. If you don't eat gluten, feel free to substitute for a gluten-free flour. I have no idea how that will work though. Truthfully, my wheat flour attempt didn't go so well...
 
The dough looked fine, so I was excited about how they would taste.

After the dough sat for an hour and I started rolling it out, it still seemed okay. But it was a little difficult to roll out. Pretty near impossible to roll it into a circle like the beautifully perfectly circular tortillas I get at Costco. But whatever, who needs perfectly circular tortillas?? As long as they taste good...


So I flopped my first tortilla into the pan. As you can see, it looks oddly shaped. But like I said, who cares, as long as it tastes good, right?? Well........................

They taste okay...But I think I made some mistakes!

First, since I hadn't made tortillas in ages, I should have followed the directions EXACTLY. I shouldn't have added any wheat flour. Also, I have a shoulder injury. What was I thinking?!?! Rolling out a bunch of tortillas was really painful for me! I should have known, as I just made a bunch of pies for Thanksgiving. Rolling out the pie crusts almost killed me!! So why I thought I could roll out 12 tortillas, I'll never know. Chalk that one up to denial.... maybe stupidity is a better word??

So, since I couldn't really effectively roll, they were very oddly shaped. And quite thick. But they tasted okay. Unfortunately, we couldn't really use them for burritos. Instead, we just added butter and ate them as a snack. Isn't everything better with butter??

And for the burritos we had for dinner?? I pulled out the tortillas I'd purchased at Costco. :-)

Saturday, November 16, 2013

Mama's Famous Cookies


These are soooo good. All chocolatey, peanut buttery, walnuty. Mmmmm!!
I adapted this from a recipe on the back of a Ghirardelli chocolate chip bag ages ago.

 Ingredients:
1 1/4 cup butter (2 1/2 sticks) at room temperature
3/4 cup packed brown sugar
1/2 cup sugar
1 egg
1 teaspoon vanilla
1 cup flour
1/2 cup whole wheat flour
2 tablespoons flax seed meal
1 teaspoon baking soda
1/2 teasppon salt
1 teaspoon cinnamon
3 cups oats (I prefer old fashioned, but quick oats work okay too)
1 cup semi-sweet chocolate chips
1 cup peanut butter chips
1 cup chopped walnuts

Directions:
1. Preheat oven to 375 degrees F. I always bake cookies on a pizza stone. I place it in the oven when I turn it on to preheat. That gets the stone the same temperature as the oven. It makes the cookies bake more evenly-when I used to make cookies on a baking sheet, they would always burn a little on the bottom. I never burn them when baking on a stone! I use the same stone throughout so that it is always hot. As you can see from the pictures, my stone is "well-loved"!
2. In a large bowl, cream butter with sugars until light and fluffy. Beat in egg and vanilla.
3. In a medium bowl, mix flours, flaxseed, baking soda, salt, and cinnamon.
4. Slowly mix flour mixture into creamed mixture (I use a handheld mixer on med-low). Stir in oats. Then fold in chips and nuts. 
5. Drop by rounded tablespoon onto stone. Bake 9 minutes (time will vary depending on what you bake them on. Nine minutes is perfect on my stone!)
6. Cool for about one minute then place on cooling rack. Store in tightly covered container.
Yield: approximately 46 cookies. Hard to count though... the kids and I sneak a few as they come out of the oven...

Friday, October 18, 2013

Yummy Pasta!


I'm not a fan of cooking... But I'm working on it!!

I didn't feel like cooking dinner, so thought I'd try a simple pasta recipe I had pinned. It is from the PopSugarFood website--here is the link:  http://www.yumsugar.com/Spaghetti-Garlic-Olive-Oil-Chili-Flakes-21398824/

It looked quick and tasty, and I was pretty hungry. I followed the recipe pretty much exactly (although I will admit-I did not measure anything. Just estimated). It was soooo good!

My younger daughter doesn't like spicy food-or pretty much anything with any flavor. (Unless it is sweet. She loves "sweet" flavors!) So first I mixed everything in except the chili flakes and dished some out for her. Then added the chili flakes for my older daughter and I. We all added shredded parmesan. It was surprisingly tasty!! I say "surprisingly" because it was so simple.

My youngest said hers was kind of bland, so she added a little bit of chili flakes. And liked it! I was impressed!

Here is the recipe:
Pasta with Garlic, Olive Oil, and Chili Flakes
Ingredients:
10 ounces angel hair pasta
2 cloves garlic, minced
1 tablespoon red chili flakes
1/3 cup extra-virgin olive oil
3/4 teaspoon salt
1/2 teaspoon black pepper
Directions:
1. Cook pasta al dente according to directions on package.
2. Strain pasta and place in serving dish. (I put it back into the pot I cooked it in. No need to get more dishes dirty!!)
3. Add garlic, chili flakes, oil, salt, and pepper. Mix well.
4. Serve. Add shredded paremesan to taste.

Wednesday, October 16, 2013

Mmmmm!!! COOKIES!!


I have become completely, totally addicted to Reese's Minis the past year. I seriously go through withdrawls when I don't have any to snack on!! Soooo.... time to break my addiction AND test out some of the yummy looking cookies I have pinned!!

Since I am addicted to the peanut butter-chocolate goodness that are minis, I looked for a cookie that had both peanut butter and chocolate. I figured it wouldn't be any help if I included minis in the cookies-there are tons of yummy recipes that include minis or chopped up bits of regular sized reeses. Looking through the hundreds of dessert recipes I have pinned (I almost got sidetracked!! Almost started looking for MORE recipes to pin rather than actually trying one out!!), I decided to try Peanut Butter Chocolate Chip Oatmeal Cookies with Sea Salt from Recipe Girl. Here is the link to her recipe: http://www.recipegirl.com/2012/03/12/peanut-butter-chocolate-chip-oatmeal-cookies-with-sea-salt/.

I couldn't follow the recipe exactly...
The is what I did to her recipe...  
PB-CC-PBC Oatmeal Cookies   ;-)

Ingredients:
 1 cup all-purpose flour
1/2 cup whole wheat flour
2 teaspoons baking soda
1/2 teaspoon salt
1 cup butter flavored Crisco
1 cup creamy peanut butter
1 cup packed light brown sugar
3/4 cup granulated white sugar
2 eggs
1/2 cup old fashioned oats
1 cup semi-sweet chocolate chips
1 cup peanut butter chips
1 cup chopped walnuts
Directions:
1. Preheat oven to 350 degrees F. I used a pizza stone instead of a cookie sheet-I love how cookies bake on stoneware! I placed the stone in the oven when I turned it on to preheat. I have found that heating up the stone first helps.
2. In medium bowl, mix flours, baking soda, and salt.
3. In large bowl, mix butter, peanut butter, and sugars with an electric mixer on medium. Add eggs one at a time. Then slowly add the dry ingredients from bowl until mixed.
4. Stir in oats. Stir in peanut butter chips, chocolate chips, and walnuts.
5. Drop the cookies by teaspoonful onto cookie sheet. Sprinkle lightly with sea salt.
6. Bake for 13 minutes. Cool for 1 minute, then remove from stone.
(See the note on baking time from the original recipe-13 minutes is what worked for me)
 I wanted to make them a little more nutritious, hence the wheat flour. I was going to add flax seed meal as part of the flour as well, but didn't want to change too much. I used Crisco instead of butter because I had some that needed to be used. I generally prefer butter in baked goods... Also-I only had old fashioned oats on hand-so that's what I used. I was going to use oat flour as well, but since I'd already swapped some of the flour, I didn't want to add oat flour...

I LOVE walnuts in cookies, that's why I added them. I think I should have added more than 1 cup. Also, I wanted to use peanut butter and chocolate chips, so I did one cup of each instead of 12 ounces of chocolate chips.

I sprinkled sea salt on the first two dozen cookies that I made. After that, I skipped the sea salt. I didn't think they were all that great with the sea salt. I thought they were just as good without...

Overall, the cookies were good. I think I was more in the mood for a more traditional oatmeal chocolate chip cookie dough rather than a peanut butter cookie dough. I thought maybe there was too much going on-maybe that was because of all the modifications I made?? My kids didn't find ANY problems with them at all though, lol.
They were yummy, just didn't exactly match my mood!
One batch made approximately 52 cookies.
My son came home from college for a couple of days. Between him, the girls, their friends, and myself, the cookies were gone in about three days!! :-/  I'll take that "proof" as another success.
Maybe tomorrow I'll make some more cookies...
I'm dying for some Reeses right now...

Sunday, October 6, 2013

Baked-on Crud

So I've become quite addicted to Pinterest.
I may have mentioned that before...
I find amazing ideas and pin them, and then never try them...

But last night, I actually tried one!!

I baked chicken about two weeks ago (I may have also mentioned I don't cook? tried that night, kinda unsuccessfully). Only one of us in the house eat chicken, and I baked two breasts, so there was a leftover breast in the fridge for about two weeks, in the dish it was roasted in. That alone is quite disgusting. I tossed the chicken and soaked the dish overnight in hot water. The baked-on marinade and chicken stuff did not budge. So I soaked it again, this time in hot soapy water. Again-the baked on crap stayed glued to the dish. I am not one who loves to scrub my arm off, especially with my shoulder/neck issues. So luckily I found a blog with an idea!!!
Here is the link:  http://www.realsimple.com/new-uses-for-old-things/new-uses-cleaning/print-index.html. The baking soda part is about 3/4 down...

Here is a picture of the dish after soaking in hot water for a day and hot soapy water for another day:
All that baked-on goodness was still stuck on there. I sprinkled baking soda all over the dish, as directed in the blog post linked above:
I let the baking soda work for about an hour (even though the directions said five minutes).
After a little scrubbing and rinsing, I saw very little change:
So I POURED the baking soda on. Thought more might help...
I added water, created a paste, and spread it thickly all over the baked-on crud. Then I soaked it overnight. In the morning, I added water, scrubbed lightly with a scrub brush, and this is what I found.
Hardly any crud left!! Yay!! I scrubbed lightly with a scrubber and the rest just fell off.
See?! Now beautiful!!
It took some time, but very little scrubbing and effort on my part. :-)

Hooray for Pinterest!!


Saturday, October 5, 2013

Single Dad Laughing article

http://www.danoah.com/2011/04/worthless-teenagers-and-parents-who.html

This is a really great article.
As a mother of teenagers, it is particularly poignant.

I definitely have my bad days. At times, I say or do things that I regret.
But I do try...

It is important to apologize. I do apologize to my kids when I realize I've made a mistake.

I recently arrived at my daughter's volleyball game late. It started at 4. I work not to far away and thought I could make it easily by leaving at 3:40. But by the time I got out of school, it was closer to 3:50. And by the time I parked and arrived at the game, it was 4:25. I seemed to hit every red light, there was tons of traffic, lots of things make the drive take longer than I expected. I felt bad. And frustrated. I went in to the game and said something to my daughter about how long it took me to get there. She said, "you didn't have to come" and went back to her teammates. I totally missed on that conversation. She thought I was complaining about being there, and I had meant to express frustration at being late. And meant to apologize. Totally not what I said or what she heard though. Later I apologized. I wanted to be at the game and I wanted to see her play. I felt bad for being late and I expressed it wrong.
I think it is important for them to know that we make mistakes.

I'm sure there are plenty of mistakes I have made that I have not apologized for. Plenty of mistakes I haven't even noticed.

Hopefully I am not like the parents written about in the above article.
I know I have my moments, but hopefully they are rare. And hopefully the good moments outweigh the bad.

Also, I am new to blogging. I hope I haven't done anything wrong by linking an article. He said to share!! But if I have erred, please let me know nicely. I will delete it or will add whatever I need to add to make it right.

Thanks!